Page 2 of 3

Entity Synchronization

Lately I’ve been tinkering with my in-game tower map user interface, and messing with adding items back in.

With the addition of item drops, syncing item data lead me to re-work how I managed entity synchronization. The original solution was quite naive and always updated clients with full entity data, regardless if that data was identical to the data during the previous server tick.

Now, entities will only transmit data if it needs to be sent, so a stationary entity will not have its transform data sent to clients every tick unless it moves and therefore the transform information changes.

I originally put this work on hold and had planned to re-factor it in the future, but as I started to create the new DroppedItem entity, which would represent an item that has dropped in the game world, I realized that the Item information that the entity held was constantly being sent over to all clients and figured it was about time to re-factor and improve the synchronization code. Now DroppedItems only send information about what items they contain when they are initialized. Subsequent updates about the items it holds only happen if the items themselves change.

Another boon to come from this is a new way for clients to learn about new entities. Originally, as I have mentioned, the server would transmit all data about an entity to all clients, and therefore the clients had enough information to re-create the entity from every entity update from the server.

Now that it only transmits updates about entities, clients would need a way to ask the server for extra information about an entity to initialize it before they can apply the updates to it. So now, instead of always having the data needed to create the entities, if a client gets an update about an entity that does not yet exist on its end yet, it will send a message to the server asking for all information about that entity. Once the server replies, the client will create that entity and then be able to apply any subsequent updates it receives from server entity updates.

I had tinkered around with another solution in where the server would keep track of new players and new entities entering a zone and the server would handle sending the full entity payload to clients that needed it, but I thought clients requesting for that information would be a better and easier solution. I feel like having the server manage it could lead to some desync situations that would be very hard to debug and it also brings down the amount of work the server has to do during its game server tick.

I know I promised a post about the in-game map, and that is still coming. I got distracted with the updates I detailed in this post and still need to polish it up. Hoping to get to that soon as well as a post about item drops when I finish them up.
Trivo Multiplayer

When I started working on Trivo, my goal was to make sure that it could be played with friends online.

So I started off with Godot and GDScript and tried to implement their built-in solution which used ENet in the backend.

This worked fine at the start, but did get a little messy. Eventually I rewrote all of my code in C# and decided to ditch the built-in ENet solution for SteamNetworkingSockets.

The main reason I switched to this was because I wanted to take advantage of Steam’s servers to allow players to play with each other without fumbling around attempting to forward the proper ports before they could connect. I feel like most online games nowadays are expected by users to work online without forwarding ports.

So far, everything is working pretty well, I’ve tested with a few friends and it works quite well while being routed through steam servers. I was able to leverage the Steam friends functionality to allow one to join another player through their Steam friend’s list.

I plan to go into more detail about my client / server architecture in a future post, stay tuned.

Entering the Tower…

I’ve been working on the mechanic for entering the tower so you can start a run in Trivo.

Since the game is being designed with multiplayer in mind, I’ve decided to create a system that allows players to start runs, or to join other on-going runs.

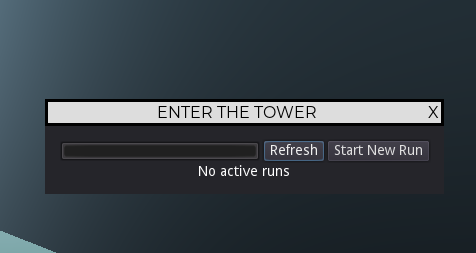
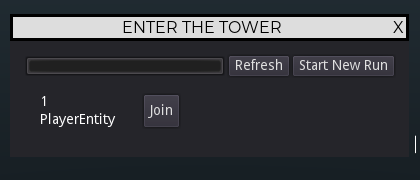
When you go up to the tower to begin, you’ll be prompted by a pop-up window whether you want to start a new run, along with the option of joining any on-going as you can see from the pictures below.

enter tower ui
No active runs
enter tower ui
One active run… by ‘PlayerEntity’

Currently it looks very plain / ugly at the moment. I just got the starting of new runs and the joining of on-going runs done with this very basic looking window. I plan to re-vamp the look now that the functionality is complete and will probably post a picture of the new one in the future.

Tower Floors

My recent game development time has been going towards working on randomized floors that the tower in Trivo is made up of. The idea is, similar to other dungeon crawler like games, that the layout is completely randomized.

The idea for Trivo is that, as you ascend the tower, you go floor by floor. Each floor is composed of randomly arranged rooms. I plan to creates hundreds of these rooms to randomly pick between, along with also randomizing things inside the room such as the types of enemies.

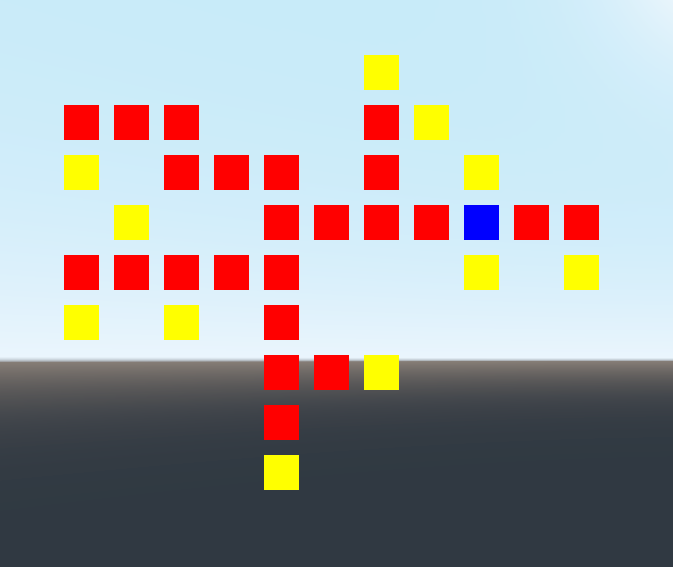
randomized floor layout
A random 35 room floor plan

Above is a “floor plan”, essentially I generate this structure above and note all the dead ends and the starting square.

I use the dead ends to put any special rooms (such as the final room of a floor) that leads to the next floor. So essentially I generate a floor plan like above, pick a random dead end that isn’t too close to the start and mark it as the exit of the floor. I can then use other random dead ends for other special rooms such as a room that may contain no enemies but may contain some treasure for the player.

This is a little sneak peek into the floor generation, and I plan to post more about the actual rooms themselves in the future.

Campfire fire

One of my earlier posts included a campfire, among other light source models.

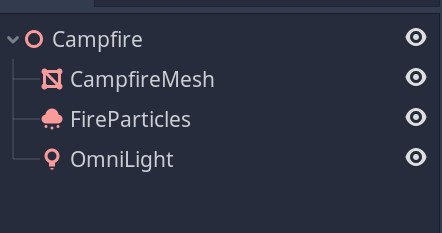
After importing them into Godot I took advantage of the built in 3D particle emitter and some lighting nodes.

campfire godot scene tree
The campfire Godot node scene, composed of the mesh, particle emitter, and a light source

With a little bit of effort and some messing about with the particle emitter, I got some very basic looking fire that will work well for my use case. Below are a small video of the campfire and a torch.

Godot

Last year I messed around with a game engine called Godot, and enjoyed how simple and lightweight it felt. I’ve used Unity in the past but after trying out Godot I preferred it instead. The way it handles game scenes is great, and I found I could get a lot more done in short amount of time in Godot compared to Unity.

The game is currently being worked on in C#. Initially it was 100% written with GDScript, a scripting language similar to python specific to Godot, but I personally prefer a statically typed language. I got frustrated with GDScript as the project and my scripts got larger and eventually decided to re-write the whole thing strictly in C# which is an option for scripts in Godot. So far, so good.

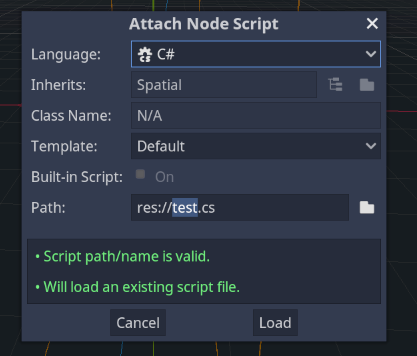
add new script to node
Attaching a new C# script to a node in Godot

Another goal of the re-write was to leverage a new networking solution (SteamNetworkingSockets) instead of the built in networking provided by Godot which uses ENet. I plan to write more about my networking in the future.

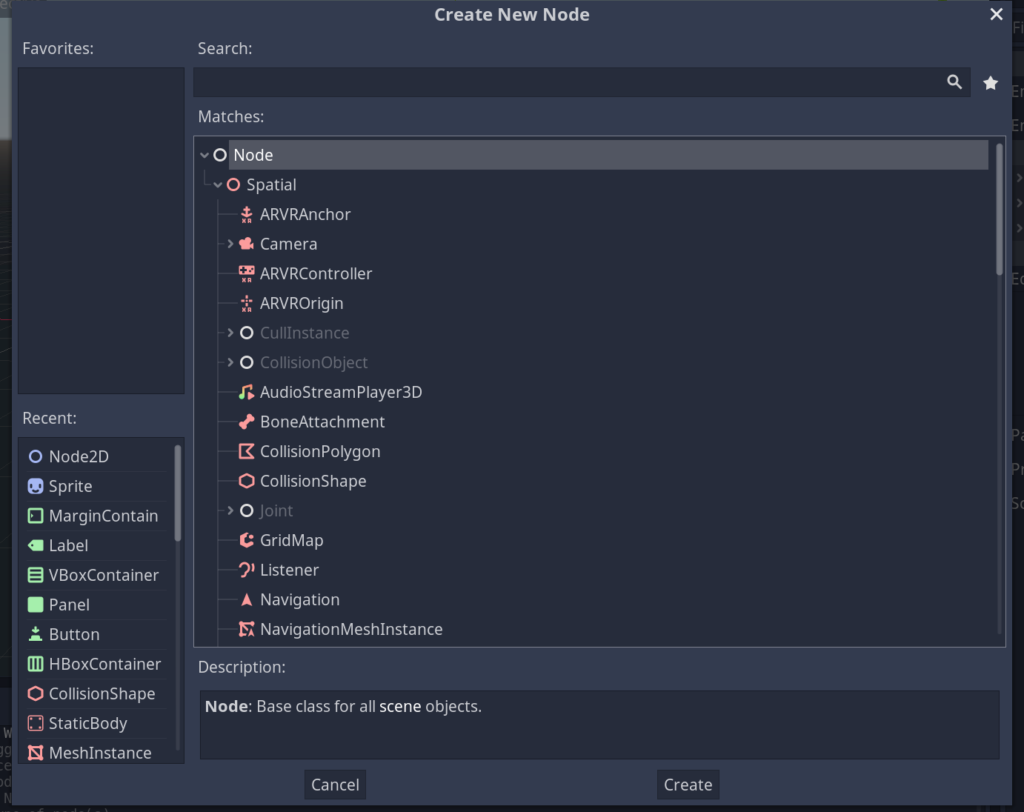
When working in Godot, every game scene is a collection of nodes, which can have nodes as their children. Essentially every scene is just a big tree of nodes.

bundled nodes
The ‘Create New Node’ window in Godot

You can instantiate these scenes easily during run time. For example, I have a player scene, and a game scene. When a player joins, I create a new instance of my player scene and add it to the game scene. Every important part of the game is a scene, which are all just composed of nodes.

In contrast to Unity which has objects which you modify and save as ‘prefabs’ to instantiate later and a entity component system (at least the last time I used it that’s how it worked), Godot felt more intuitive and straight forward. Everything was a node.

For a quick example, in Unity you might have a generic object, and to make it render, you attach a sprite renderer component, in Godot you’d add a Sprite node to your node.

node with a sprite node child
A 2D node with a Sprite node child

Anyway, I’m kind of rambling but basically I enjoyed how Godot worked and for my use case it performs perfectly, and Trivo runs quite smoothly on it so far. I plan to keep using it unless it somehow fails to provide what I need for Trivo. With Godot 4.0 coming soon I’m excited to see all the new changes.

Door Portal… Dortal?

portal
A portal that players can enter in Trivo’s tower

Originally I was going to have doors between the rooms, but I ended up going with this portal like effect, but all the code references still call them ‘Doors’ hence the odd post title.

Essentially when you enter a floor of the tower, the game will randomly generate a bunch of rooms connected by these portals, which the player must clear of enemies before they can ascend to the next floor.

I ended up using the skulls I sculpted in an earlier post to create some dark portals that players will use to move between rooms inside the tower. I’m currently messing with shaders to get a cool portal / dark effect when the portal is active and you can kind of see that above. I’m still tinkering with shaders and the door effect and will be posting more about it in the future.

Godot NodePaths

So recently I’ve been doing the user interface for Trivo, and I had been referencing all the control nodes that I needed by creating string variables and storing the path to them.

This worked, but anytime the scene’s node hierarchy changed, my hard-coded string paths would all be incorrect and have to be updated. This caused changes to the UI to be quite cumbersome since I had to copy new node paths over to my code each time.

I got fed up with the workflow and looked for another way, and I can’t believe it took me this long to figure a cleaner way to manage references to the nodes I want to manipulate in my scripts.

Essentially, Godot has a nice feature that allows you, in the editor, to set a scene’s variable. Godot also features a handy variable type called a NodePath which is just essentially reference to a node in a scene. Combining these two features allows one to easily add NodePaths to your script which you can then set to nodes in your scene that will automatically update even if they’ve been moved.

A picture of the script variables, which you can set to nodes in the scene
The node path selection pop-up in Godot

This is pretty simple, but for whatever reason I never leveraged it until now. Glad I’m using it now though, makes changes to the scene tree much easier when I don’t break all the references in the script.

“Sculpting”

Tried my hand at doing sculpting with Blender. I figured I’d try making a skull for some more creepy areas in the game.

Up until now, I’d been manipulating vertices, edges, and faces manually in Blender to create my models. Doing it this way meant the models I created did not contain many polygons, thus the name ‘low poly’ models.

Sculpting on the other hand is essentially giving broad instructions to areas of the model. So you can select an area and push it inwards and it will make a small dent on the model. Essentially like real sculpting, hence the name. This requires models that contain a bunch of vertices to manipulate.

I created the skull below using a reference image, a sphere packed with a lot of vertices and a bunch of mistakes.

smooth skull
“smooth” skull from sculpting
smooth skull 2
“smooth” skull from behind

Now I want to use this in my games, but it doesn’t really fit too well with all of my other low poly models. So I used a decimate modifier on the model to bring down the poly count in an attempt to bring it into the style of my existing models.

"low poly" skull
decimated “low poly” skull
"low poly" skull 2
decimated “low poly” skull from behind

You can easily make out the individual faces of the skull now, giving it a more low poly look. It still has a lot more polygons than any of my other models, but it does fit a little better compared to before if I do say so myself.

After I tweaked it a bit with the decimate modifier, I decided to add little horns and put the skull on a spike.

Sculpting seems pretty useful, but I think I’d need to take advantage of a tablet and pen to do it properly since all the tools are pressure sensitive. I did the above with mouse and keyboard but it takes a lot of adjusting of the pressure setting on the tools instead of just adjusting the pressure of the pen physically.

Maybe I’ll give it a shot with my tablet and see how it goes and post about it in the future.

Loot!

loot bag 3d model
The loot bag, a screenshot from inside blender

Just a small little post showing a loot bag I made for item drops in Trivo.

These will be used to hold items, which will drop from slain enemies.

The player will be able to interact with these bags and a window will appear showing the items contained in the bag and the option transfer the contents to their own inventory.

Slightly different angle picture

I’m hoping to be able to post pictures of the in-game looting window soon, but I’m currently re-working sections of the in-game user interface. When that’s done I’ll post more about it with pictures.